Microsoft has removed the option to disable Windows Updates in Windows 10 from Settings Window. However, if you want to disable the automatic updates, you can achieve it by following either one of the methods below.
Method 1: (for people connected to WiFi)
- Go ahead and Click on your WiFi icon on your taskbar and open “Network Settings”.

- Scroll down and select “Advanced options”.

- Scroll down and you’ll see an option called “Set as metered connection”, Activate that option and you’re good to go.

Method 2:
Method 1 will only work if you are connected to WiFi and you would have to set every WiFi network you connect to as Metered. So here is another option to disable it completely.
- Open Task Manager.
- Go to the tab named “Services”.
- You’ll see an option at the bottom called “Open Services”, Open that!

- You’ll have a window opened with a bunch of services that are either working or not at the moment.
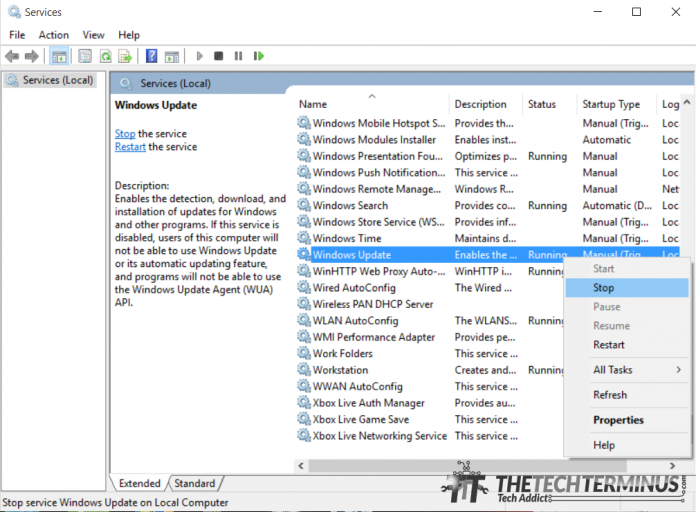
- Scroll and look for the service “Windows Update”.
- Right Click on the service and stop it. Then Right Click on it again and click on Properties.

- Choose Disabled as the option in the dropdown for startup type.

That’s it, guys. Hope you enjoyed the tutorial as much as I enjoyed sharing the information.


